

How To Make A Tumbler Template
Make a tumbler template on procreate! Customize tumblers in a easy but cute way!
These tips and tricks can besides be used to customize Starbucks cups, but know the size of the decals and repeat the steps in this post! Get the starbucks cup decal size guide Here!
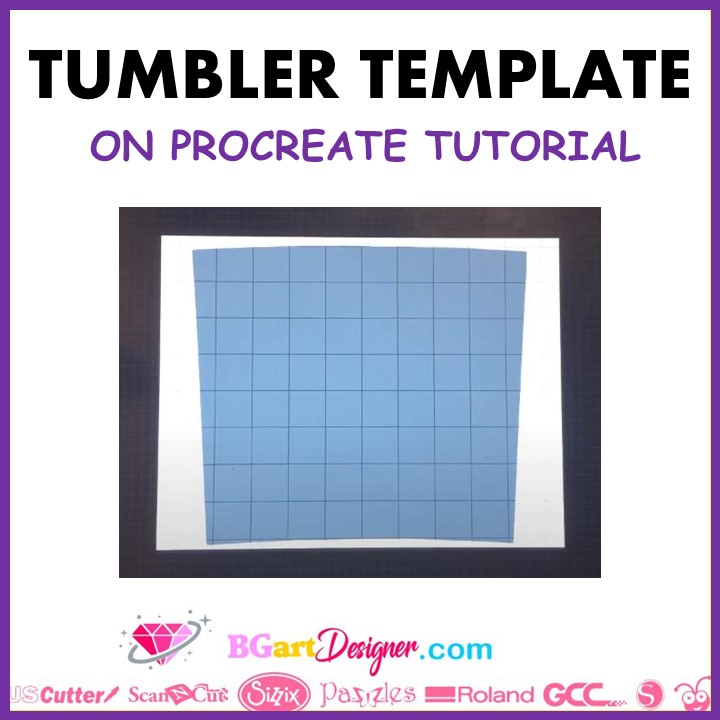
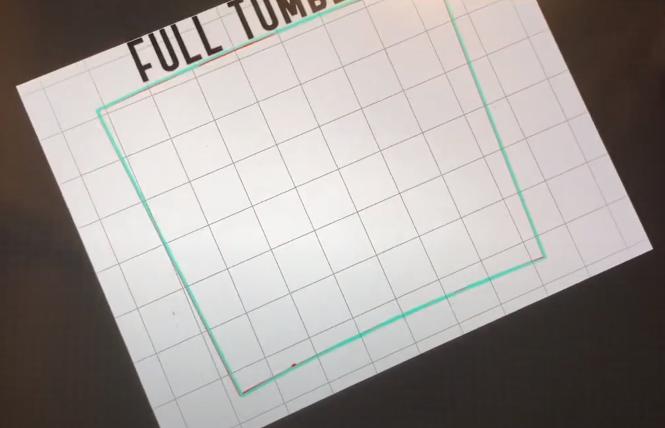
Template for a straight Tumbler
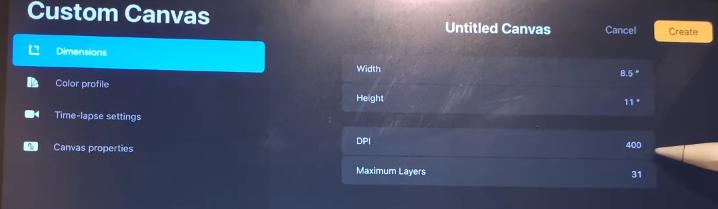
So outset click on the plus push, and click on the plus beneath that, gear up the units to inches; and set the measurement to 8.5 and 11. Set the DPI to 400, this is pixels per inch. Then lay it horizontally to brand the tumbler stencil.
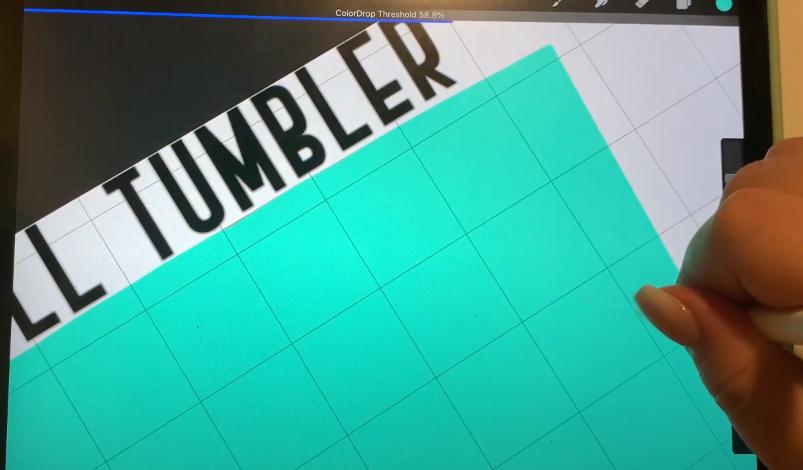
At present select the color tool at the top and make sure you are on a layer, fill the layer with that color. So click on the "click icon", this is to change the square to the size of the cup template. For a 20 oz straight tumbler the dimensions are 9.3 past 8.2 inches, or 3720 x 3280 pixels (400 DPI). For a 12 oz sippy tumbler the dimensions are viii.9 x 4.6 inches or 3560 x 1840 pixels (400 DPI).
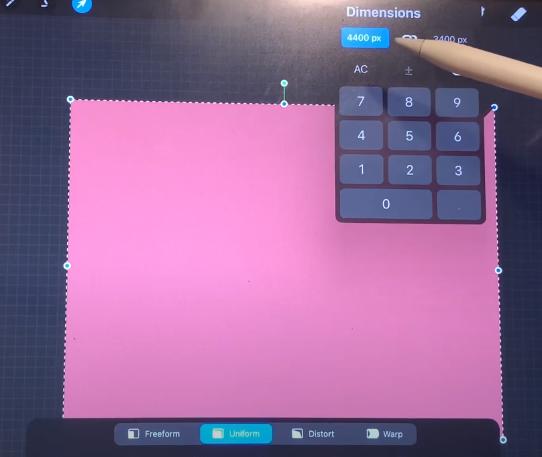
To type a different number on each side of the dimensions make sure the string icon is non blue, if it is, click on information technology and you tin can put dissimilar numbers to size the template
Set the dimensions of the tumbler. Now click on the adaptable wrench icon, go to the canvass, and set the drawing guide, to get all the squares just like in the blueprint infinite. Become to the cartoon guide settings; alter the grid dimensions, alter it to inches and make it one inch. This will assistance you determine the size of the stencils, this method applies to making many types of stencils.
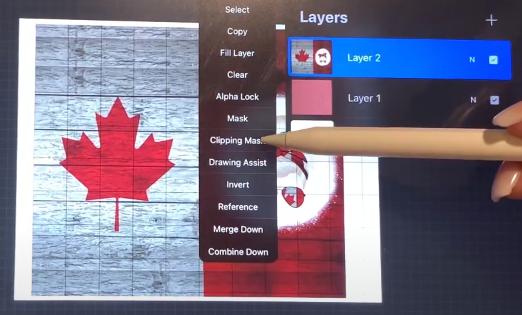
Now align the template blueprint to the filigree, now add a layer, and click again on the adjustable wrench icon, click add, and insert the image, or design. Align the design on the template; so click on the layers icon and click on the layer where the design is, finally click on the "clipping mask" option, this is to put the image over the template.
This way it will cutting perfectly in the dimension of the tumbler.
Save the template file as a png, so you can use this in the future; and non have to make a template each time.
For a tapered Tumbler
Now to make a template for a tapered tumbler, go to google and pull upwards an image of a tapered tumbler template, add together the prototype to the photos, and insert that photograph into the procreate sheet. Make it as large as possible; correct now the size of information technology doesn't thing. And so add some other layer and select a bright color to trace.
When cartoon a line, concord it a piddling and it will become a straight line. Describe the whole stencil as close as possible. And then fill it with the color; then that it fills in completely and avoids the threshold. Put the color and drag the pencil over it, move the pencil to the right without lifting it from the screen, and at the top, you will see a line increasing. This volition change the threshold.
At present lower the opacity of the color layer; to see the lines underneath, to make sure it'southward well-drawn. Erase everything that's gone over and make sure the stencils look adept; covering all the lines well. When everything is fine, erase the image layer.
And finally resize the tracing, to brand the template. Select the layer, click on the click icon, and click on one of those picayune dots to bring up the dimension adjustment box. The dimensions are 9.3 by 8.ii inches, or 3720 by 3280 pixels (400 DPI). Repeat the process of adding an image and that is it!
It'south super awesome isn't it, with this it'south possible to make designs with a template so easily in procreate and transport information technology to print or cut afterwards!

How To Make A Tumbler Template,
Source: https://bgartdesigner.com/make-tumbler-template-procreate/
Posted by: youngerbeand1978.blogspot.com
0 Response to "How To Make A Tumbler Template"
Post a Comment