

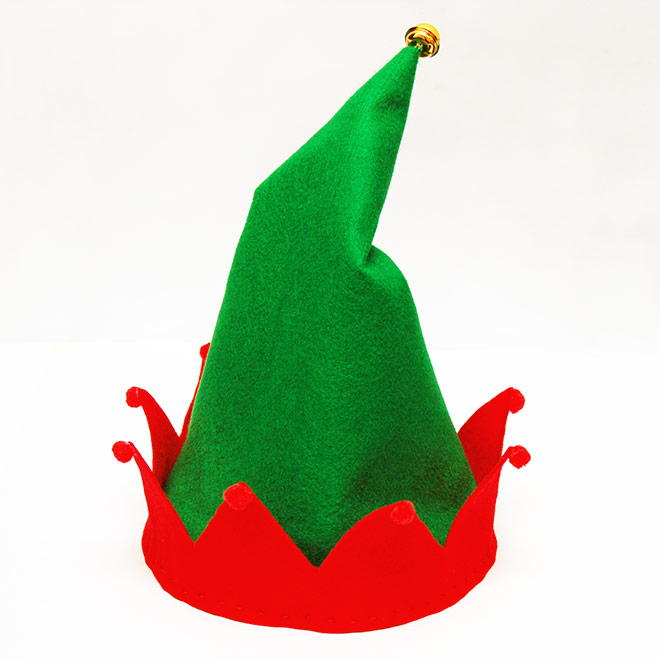
How To Draw A Elf Hat
Supplies Needed
- Cerise and green felt or velvet fabric
- Jingle bell
- Needle and thread, felt mucilage depression temperature glue gun
- String
- Newspaper
- Pencil
- Scissors
- Ruler
- Masking tape
- Small-scale red or dark-green pompoms (optional)
STEPS
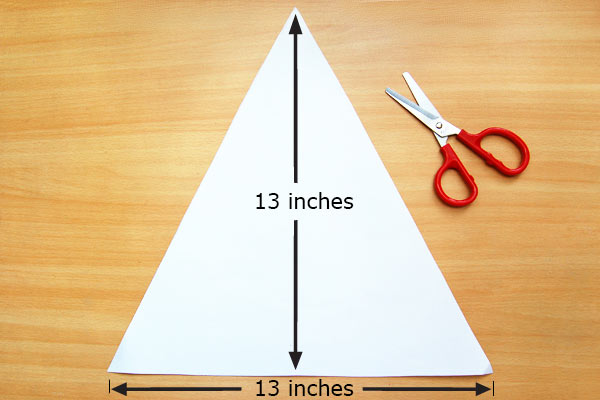
1Make a newspaper triangle.
The first stride is to make a hat design from paper. Draw and cut a triangle with a base length and height of thirteen inches.
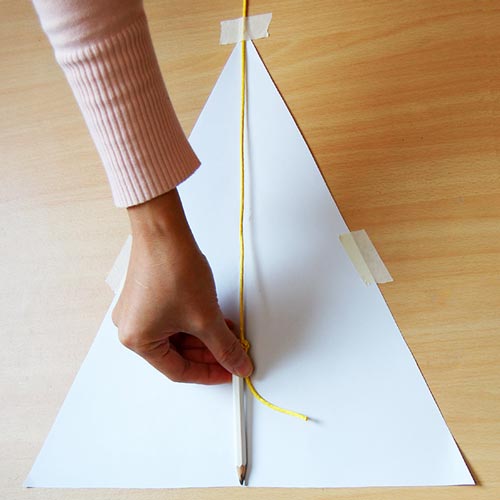
2Tie a pencil to a string.
Record your triangle to a flat work surface. Tie a pencil to a string and stretch the string taut from the apex (or tip) of the triangle until the betoken of the pencil touches the midpoint of the triangle's base.
You'll find that information technology will make the side by side step much easier if y'all tape the string to the apex of the triangle as well.
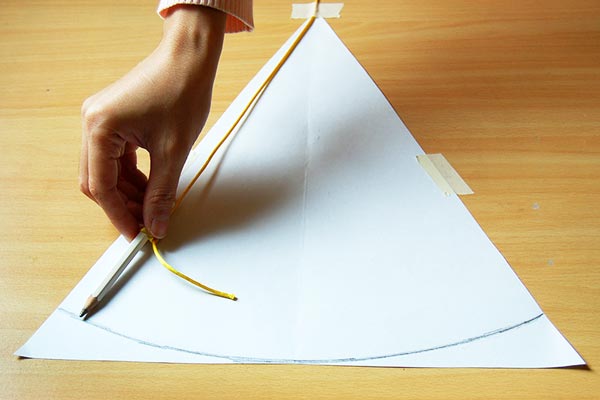
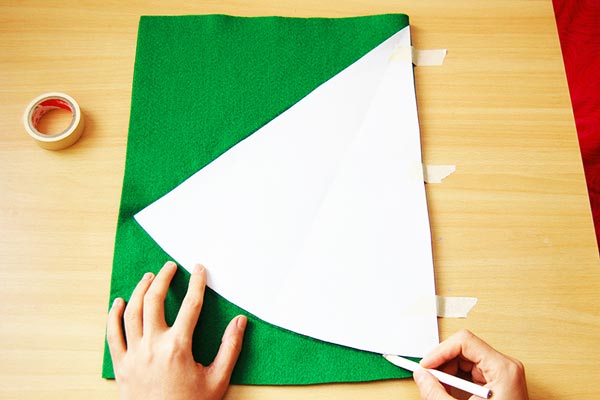
3Describe an arc.
While keeping the cord taut, draw an arc spanning the two reverse sides of the triangle.
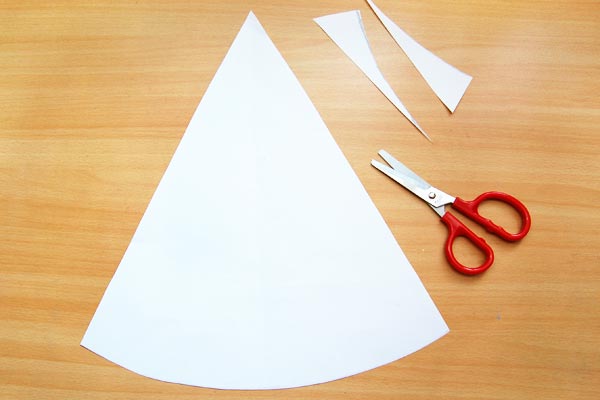
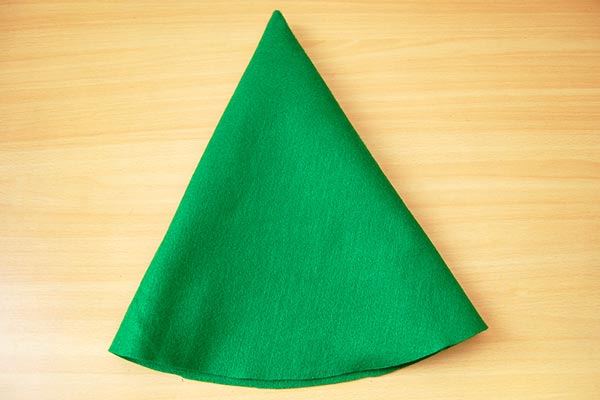
ivCutting out.
Cut the triangle following the arc. The resulting shape looks something like a piece of pie. This volition be your elf lid pattern.
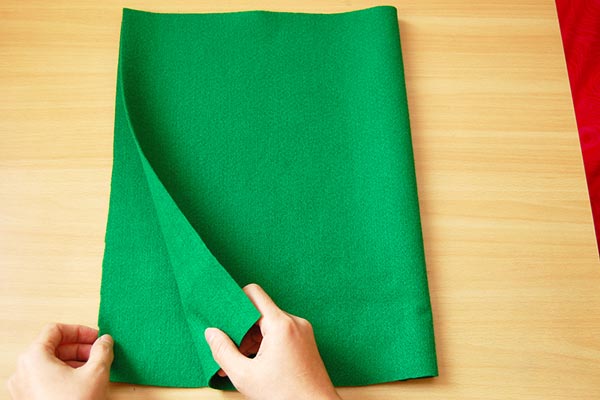
5Prepare a sheet of felt or fabric.
Prepare a large sheet (at least 22 x 14 inches) of green or carmine felt. If y'all want a soft or droopy hat, use thin felt or a soft-type fabric such as velvet.
In instance you lot don't have a large enough canvas of felt or fabric, you can use two smaller sheets. Each canvass should be the same size or a little larger than your lid pattern.
sixTrace the pattern onto the cloth.
Align i side of your hat pattern along the folded edge of the fabric. Tape the pattern in place if you like. Trace the outline of the pattern onto the cloth.
If you are using 2 smaller felt or textile sheets, trace the hat pattern onto each canvass.
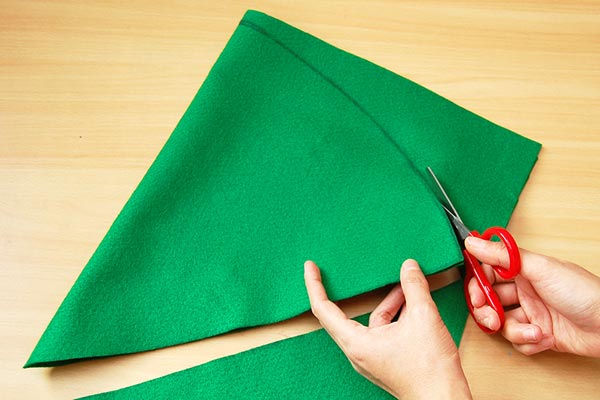
viiCutting the fabric.
While keeping the material folded, cut forth the hat outline.
If you are working with two smaller fabric sheets, cutting out the lid outline on each sheet.
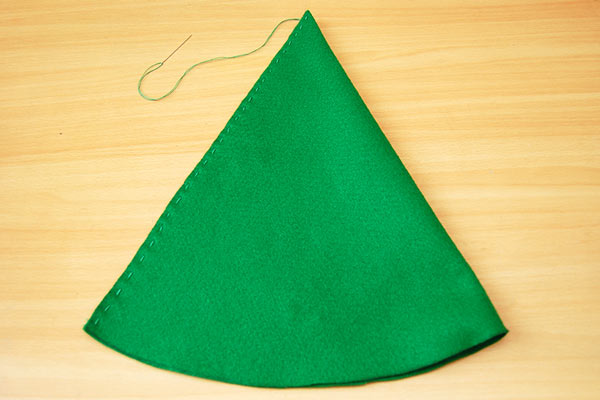
8Join the directly edges together.
Join the straight edges of the folded cloth by stitching them together or by gluing them together with felt glue or low temperature glue gun.
When working with 2 smaller sheets, sew or mucilage the pair of chapeau cut-outs together along their two direct sides.
9Turn the lid inside-out.
Turn the hat within-out then that the stitches or the glued edges are concealed within. You will also notice that you lot now take a cone-shaped fabric hat.
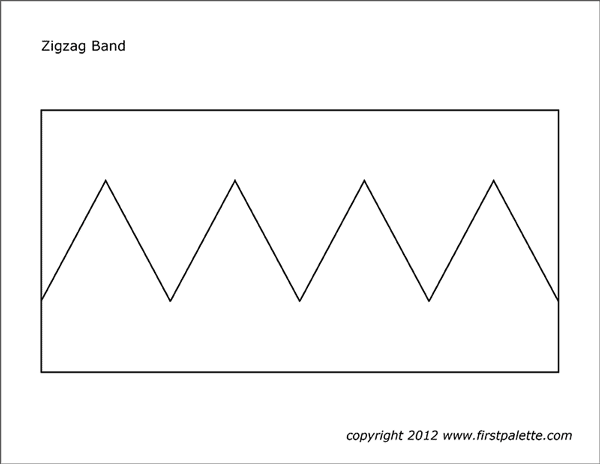
10Print out the zigzag band template.
Print out this zigzag band template on A4 or Letter size paper. Cutting out the rectangle then cut along the zigzag line. Take ane of the two zigzag sections and utilize this every bit the blueprint for making the band effectually the base of operations of your elf chapeau.

elevenCreate a zigzag band.
If you went with greenish textile for the hat, apply crimson felt or fabric for the zigzag band at the base of the hat, or vice-versa.
Place the zigzag pattern on meridian of the fabric. Trace effectually the pattern repeatedly (approximately 3 times) to brand a long ring that can go around the entire base of the hat.

12Cut out the zigzag felt ring.
Cut out the felt zigzag band. If your felt canvas is not long enough, you can make shorter pieces then glue or run up them together to make a longer band.
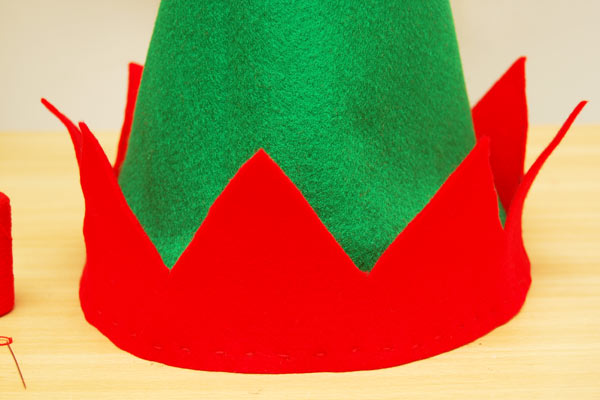
thirteenAdhere the band to the chapeau's base of operations..
Stitch or hot gum the zigzag band to the base of operations of the lid.

14Create a lid topper.
Run up or mucilage a jingle bell at the tip of your elf hat.
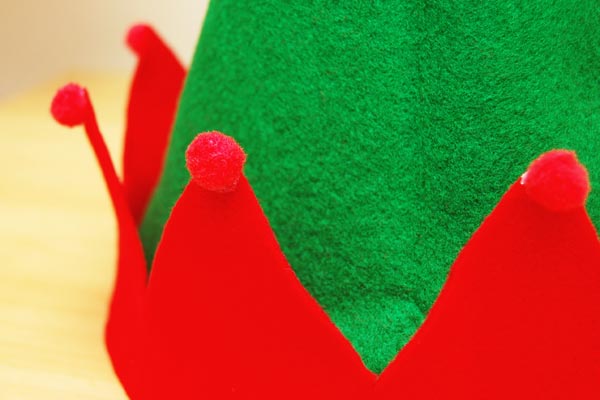
15Add tiny pompoms.
Y'all can further decorate your elf hat by stitching or gluing modest pompoms or tiny jingle bells at the tips of the zigzag ring.
16Wear the hat.
Finally, effort on your hat. Clothing information technology as part of a Christmas elf hat costume.
You Might Too Like
Comments

Source: https://www.firstpalette.com/craft/christmas-elf-hat.html
Posted by: youngerbeand1978.blogspot.com
0 Response to "How To Draw A Elf Hat"
Post a Comment